Welcome! You hold the power to create something beautiful with just yarn and needles. Learning to knit might feel tricky at first, but you can do it. This Knitting Guide will help you build skills and confidence, even if you have never held knitting needles before. Mistakes happen, but that is part of learning. With practice, you will surprise yourself with what you can make!
Key Takeaways
Start knitting with simple tools: size 8 or 9 wooden needles and light-colored worsted weight yarn to see your stitches clearly.
Learn the basics first: master the slip knot, casting on, knit stitch, and purl stitch to build a strong foundation.
Practice regularly with small projects like a garter stitch scarf to build confidence and improve your skills.
Read patterns carefully, understand common abbreviations, and try knitting in the round for seamless projects.
Join knitting communities online or locally to get support, share your progress, and find inspiration.
Getting Started
What Is Knitting
Knitting is a craft where you use two needles to turn yarn into fabric by making loops. People have practiced knitting for hundreds of years. The oldest known knitted items are socks from 11th century Egypt. These socks even used the purl stitch, which shows that knitters have always loved trying new things. Over time, knitting became important in many cultures, like in Scotland, where families made sweaters with special patterns. Today, knitting is not just about making clothes. Some people use it to tell stories or show data, like making a blanket where each color shows the temperature for a day.
How Knitting Works
You create fabric by pulling loops of yarn through other loops. The two main stitches are knit and purl. When you knit, you pull the yarn through the loop from below. When you purl, you pull it through from above. This looping makes the fabric stretchy and soft. You can also shape your project by adding or removing stitches. Colorwork lets you use more than one yarn to make patterns. Even simple stitches can make beautiful things.
Tip: Start with size 8 or 9 straight needles (about 10 inches long) and light-colored worsted weight wool or a wool blend. Light colors help you see your stitches better.
First Steps: Slip Knot and Casting On
Every project begins with a slip knot. This knot holds your yarn on the needle. Studies show that breaking the slip knot into small steps and practicing each one helps beginners learn quickly and correctly. After the slip knot, you cast on stitches. This means you add loops to your needle, which will become the first row of your project.
The Knit Stitch
The knit stitch is the first stitch most people learn. You push the needle through a loop, wrap the yarn, and pull it through. Practice this stitch until it feels comfortable. Try making a few rows to see how the fabric grows.
The Purl Stitch
The purl stitch is the knit stitch’s best friend. You bring the yarn to the front, push the needle through, and pull the yarn through from above. Many beginner patterns use only knit and purl stitches. You can find lots of easy tutorials and videos that show each step. Even if your stitches look uneven at first, you will get better with practice.
Casting Off
When you finish your project, you need to cast off. This step secures your stitches so your work does not unravel. Take your time and follow each step. Soon, you will have a finished piece to be proud of!
Keep your first projects simple, like a garter stitch scarf.
Practice several times a week to build muscle memory and confidence.
Knitting Guide: Tools and Materials

Choosing Needles
Picking the right needles can make your first knitting experience much easier. Many experts suggest starting with wooden or bamboo needles. These materials feel warm in your hands and help keep your stitches from slipping off. You get better grip and control, which is great when you are just learning. Medium-sized needles, like US 8 (5.0mm), work well for most beginners. They are not too big or too small, so you can see your stitches clearly and move them easily.
Tip: Wooden needles are gentle on your hands and help reduce strain, especially if you plan to knit for a long time.
Here are some features to look for:
Lightweight and comfortable to hold
Smooth surface, but not too slippery
Medium size (US 8 or 9)
Rounded or slightly pointed tips
Selecting Yarn
The yarn you choose matters a lot. For your first project, try a worsted weight or bulky yarn. These yarns are thick enough to help you see your stitches and finish projects faster. Wool or wool blends with at least 80% wool are flexible and easy to work with. They also make it easier to fix mistakes, which is helpful when you are learning.
Light-colored yarns are best for beginners. You can see your stitches better and spot any mistakes quickly. Dark yarns can hide your stitches, making it harder to learn.
Yarn Weight | Good For Beginners? | Why? |
|---|---|---|
Bulky | 👍 Yes | Easy to see stitches |
Worsted | 👍 Yes | Good stitch definition |
Fingering | 👎 No | Too thin, harder to see |
Optional Accessories
You do not need a lot of tools to get started. The Knitting Guide recommends just a ball of yarn and a pair of needles for your first few projects. That keeps things simple and affordable.
Other tools can help as you go along, but they are not required at the start:
Scissors (for cutting yarn)
Tape measure (to check your progress)
Stitch markers (to mark spots in your work)
Tapestry needle (for weaving in ends)
Note: As you get more comfortable, you might want to try these extras, but you can start knitting today with just the basics.
The Knitting Guide wants you to feel confident and ready. You only need two things to begin: yarn and needles. Everything else can wait until you are ready for more.
Essential Techniques
Slip Knot
Every knitting project starts with a slip knot. This knot holds your yarn on the needle and forms the first stitch. You might feel nervous about making your first slip knot, but you can do it! Here’s a simple step-by-step way to make a slip knot and get ready to cast on:
Measure a yarn tail about three times the width of your project, plus a little extra for weaving in later.
Make a loop with the yarn, leaving the tail long enough.
Pull a section of the tail through the loop to form the slip knot.
Slide the slip knot onto your needle and pull it snug, but not too tight.
Hold the yarn tail in front and the working yarn in back. Grip both strands in your left hand.
Spread your thumb and index finger to make a diamond shape with the yarn.
Turn your palm up and insert the needle under the loop on your thumb.
Slide the needle behind the yarn on your index finger and hook it through the loop on your thumb.
Slip the loop off your thumb and pull the needle away to tighten the stitch.
Repeat these steps to cast on more stitches, counting the slip knot as your first stitch.
Tip: If you get stuck, try watching a video or looking at step-by-step photos. Many beginners find visual guides helpful.
Casting On Methods
Casting on means adding stitches to your needle so you can start knitting. The Knitting Guide recommends learning two popular methods: the long-tail cast-on and the knitted cast-on.
Long-tail cast-on gives you a neat, stretchy edge. You use both the yarn tail and the working yarn. This method works well for most projects, especially scarves and sweaters.
Knitted cast-on uses only the working yarn. It’s easy to learn and great for beginners. You make each new stitch by knitting into the previous one.
Some knitters compare different cast-on methods to find what works best. For example, a knitting blogger found that a knitting-only provisional cast-on saves time and avoids problems like tangled scrap yarn. She liked that she didn’t need extra tools and could use only her knitting skills. This made her projects faster and less stressful.
Try both methods and see which one feels better for you. The Knitting Guide encourages you to experiment and find your favorite.
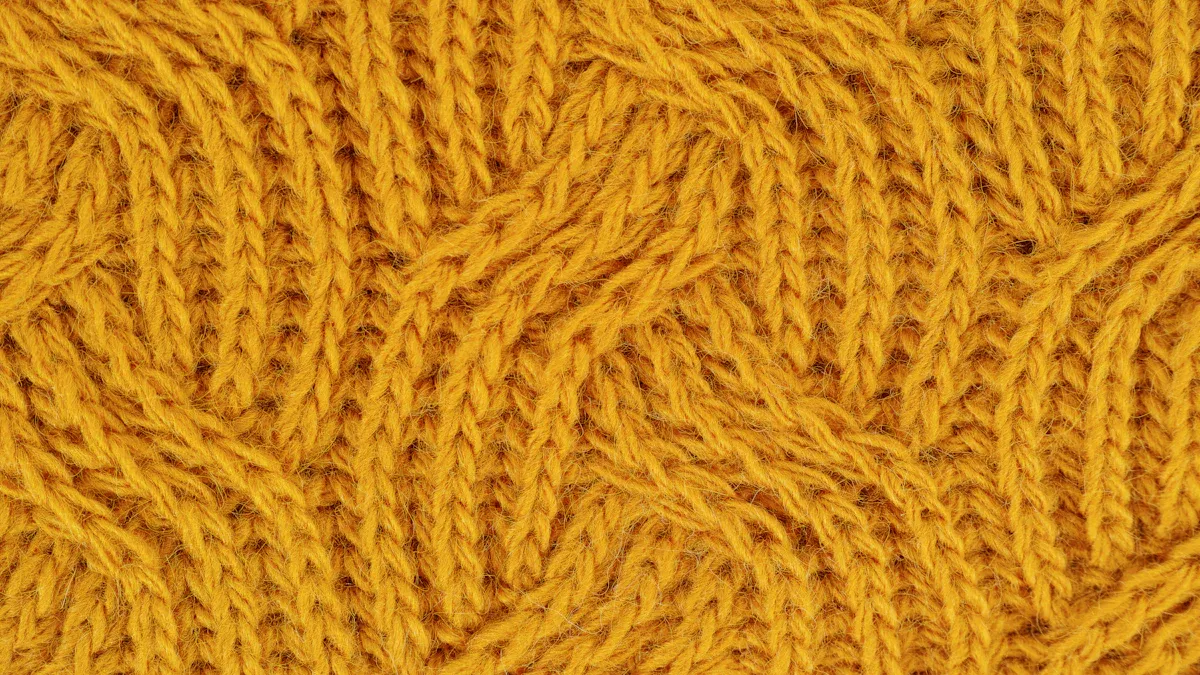
Knit and Purl Stitches
You only need to learn two stitches to make many beautiful things: the knit stitch and the purl stitch.
Knit stitch: Hold the yarn in back. Insert the right needle into the first stitch on the left needle from front to back. Wrap the yarn around the right needle and pull it through. Slide the old stitch off the left needle.
Purl stitch: Hold the yarn in front. Insert the right needle into the first stitch from right to left. Wrap the yarn around the right needle and pull it through. Slide the old stitch off.
When you combine knit and purl stitches, you can create different types of fabric. Here’s a quick look at what happens when you mix them:
Knit Fabric Type | Structural Characteristics | Resulting Fabric Properties | Implications for Combining Knit and Purl Stitches |
|---|---|---|---|
Loops on the same side of the fabric | Most common, less stretchy | Uniform face but less elasticity | |
Rib Knit | Loops on alternating faces of the fabric | Very stretchy, commonly used in cuffs | Combining knit and purl stitches increases stretch and elasticity, useful for flexible areas |
Purl Knit | Identical faces created by alternating stitches | Very stretchy, symmetrical faces | Combining knit and purl stitches creates uniform faces and high stretch, but may affect fabric stability |
Note: If your fabric looks uneven at first, don’t worry. With practice, your stitches will become more even and your fabric will look great.
Fixing Mistakes
Everyone makes mistakes when learning to knit. The Knitting Guide wants you to know that fixing mistakes is part of the process. Here are some ways to spot and fix common problems:
Count your stitches often to make sure you haven’t lost or added any by accident.
Look for holes or ladders in your fabric. These can mean you dropped a stitch.
Use stitch markers to mark tricky spots or places where you made a mistake.
Knit a small swatch (about 4×4 inches) and count the stitches and rows. This helps you check your size and tension.
Watch the edges of your work. If the cast-on edge curls in, it might be too tight. If it looks loose and sloppy, try a smaller needle.
Use row counters and stitch markers to keep track of your progress.
Learn to recognize stitch patterns. This helps you spot mistakes and know where to fix them.
If you feel frustrated, take a break and come back later. Many knitters find that mistakes help them learn faster. You can always ask for help or look for a video tutorial if you get stuck.
Beginner Projects
Garter Stitch Scarf
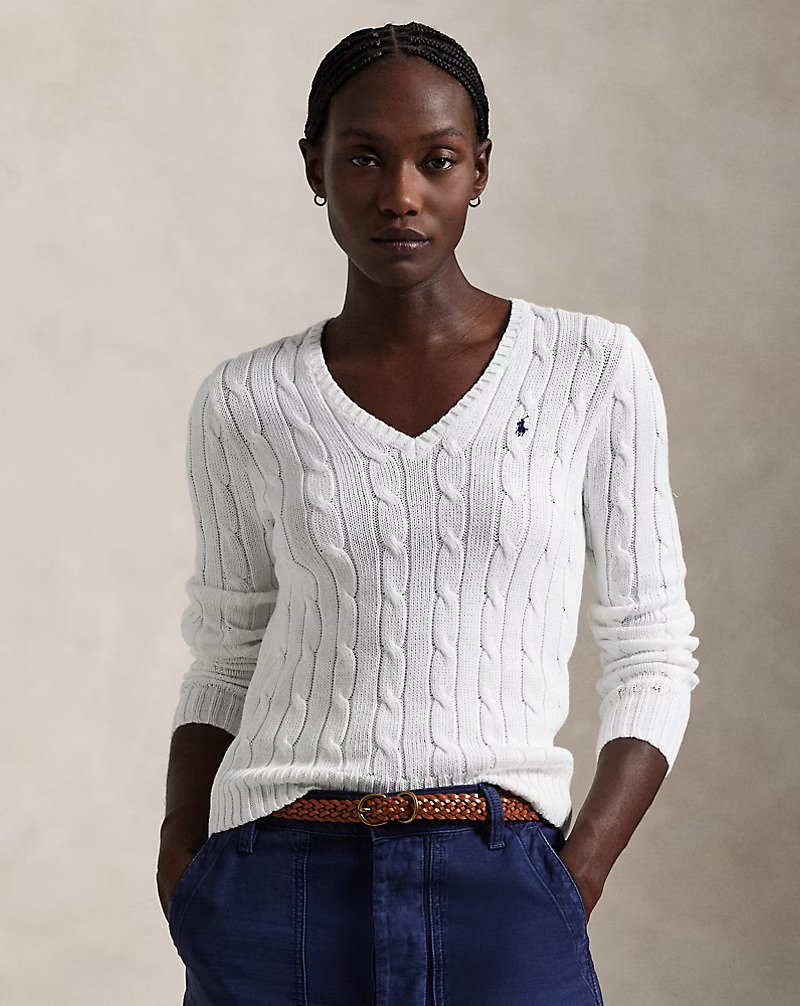
A garter stitch scarf makes the perfect first project. You only need to use the knit stitch, so you can focus on getting comfortable with your needles and yarn. Pick a light-colored, soft yarn. Cast on about 20 stitches. Knit every row until your scarf reaches the length you like. You will see the fabric grow with each row, and you will notice your stitches becoming more even.
Tip: If you lose track of your rows, just count the ridges on your scarf. Each ridge equals two rows!
You can finish your scarf by casting off and weaving in the yarn ends with a tapestry needle. Wear your new scarf or give it as a gift. You will feel proud of your first handmade piece.
Simple Hat
Once you finish your scarf, you might want to try a simple hat. Hats help you learn new skills, like knitting in the round or using basic decreases. Choose a pattern labeled “beginner” and use the same yarn as your scarf. Many easy hat patterns use only knit stitches, so you can build on what you already know.
Use circular needles or double-pointed needles for hats.
Follow the pattern step by step.
Try on your hat as you go to check the fit.
Making a hat gives you a sense of accomplishment. You will see how your skills grow with each project.
Practice Tips
Small projects help you build confidence. You do not need to rush. Practice a little bit each day. Your hands will remember the motions, and your stitches will improve.
Set aside 10–15 minutes for knitting practice.
Try new stitches on a small swatch before starting a big project.
Celebrate your progress, even if it feels slow.
Remember: Every knitter started as a beginner. Patience and practice will help you succeed. 😊
Reading Patterns
Pattern Basics
Reading a knitting pattern can feel like learning a new language. You will see lists, numbers, and special words. Most patterns start with a materials list. This tells you what yarn to use, how much you need, and what size needles work best. Patterns also mention yarn weight, like lace, fingering, worsted, or bulky. Always check the gauge section. Gauge means how many stitches and rows fit in one inch. If your gauge matches the pattern, your project will turn out the right size.
Patterns break down each step. You will see instructions for casting on, knitting, purling, and shaping. Some patterns use charts with symbols. These show you how to knit each row or round. If you get confused, try writing out the steps in your own words or drawing a simple map of the pattern. Many knitters call this “sweater mapping.” It helps you see where to increase or decrease stitches.
Tip: Follow the instructions for your size exactly. Do not guess or skip steps. If the pattern says to repeat something zero times, just skip it.
Common Abbreviations
Patterns use lots of abbreviations to save space. You might see “k” for knit, “p” for purl, or “st” for stitch. Most patterns include a list of abbreviations at the end or in the back of the booklet. Always check this list before you start. If you find a new term, look it up in a trusted online resource. Avoid random tutorials that might give you the wrong information.
Here are some common abbreviations you will see:
k – knit
p – purl
yo – yarn over
k2tog – knit two together
ssk – slip, slip, knit
Mark your pattern with notes or use stitch markers to keep track of your place. This helps you avoid mistakes and makes knitting more fun.
Knitting in the Round
Knitting in the round lets you make tubes, like hats or sweater bodies, without seams. You use circular needles or double-pointed needles. Many knitters love this method because it feels smooth and relaxing. You do not have to turn your work at the end of each row. The right side always faces you.
Advantage | Explanation |
|---|---|
Seamless garment construction | You can knit sweaters or sleeves without sewing side seams. |
Circular needles spread the weight, making knitting more comfortable. | |
You keep knitting in one direction, which feels calming and easy to follow. | |
Great for big projects | Circular needles hold lots of stitches, so nothing slips off. |
Knitting in the round also works well in small spaces, like on a plane. You can try new techniques and make projects that are hard to do with straight needles. The Knitting Guide suggests giving it a try once you feel ready.
Sweater Basics
Planning Your Sweater
Ready to knit your first sweater? Start by thinking about what you want to wear. Maybe you like cozy, oversized pullovers or simple cardigans. Look at photos, magazines, or even your favorite clothes for ideas. You can make a mood board with pictures, colors, and yarn samples. This helps you see your style and keeps you inspired.
Here’s a simple plan to get started:
Pick a style that matches your taste.
Gather ideas from fashion, friends, or online trends.
Collect yarn samples and color swatches.
Sketch a basic shape. Add details like stripes or buttons if you want.
Choose yarn that feels good and fits your climate.
Check out this table to help you pick the right yarn:
Textile Type | Key Properties | Best Use for Sweaters |
|---|---|---|
Wool | Warm, durable, versatile | Great for cozy sweaters |
Cotton | Soft, breathable | Good for lighter sweaters |
Polyester | Durable, stretchy | Nice in blends for easy care |
Choosing a Pattern
Pick a beginner-friendly pattern. Look for words like “easy” or “first sweater.” Patterns with simple shapes and clear instructions work best. Make sure the pattern matches your skill level and the yarn you picked. Check the size chart and measure yourself. Sweaters fit better when you use the right size.
Tip: Read through the whole pattern before you start. This helps you spot any tricky parts.
Stay patient. Sweaters take time, but you will learn a lot. If you feel stuck, take a break or ask for help in a knitting group.
Blocking and Finishing
Blocking makes your sweater look polished. When you block, you soak your sweater, shape it, and let it dry flat. This step smooths out bumps and helps your stitches look even. Blocking also makes the yarn softer and the sweater more comfortable. If you knit lace or cables, blocking opens up the design and shows off your hard work.
Follow these steps:
Soak your sweater in cool water.
Gently squeeze out extra water.
Lay it flat on a towel and shape it to the right size.
Let it dry completely.
Note: Blocking helps your sweater keep its shape and last longer.
Sharing Your Work
You finished your sweater—congratulations! Take photos and share them with friends or online knitting groups. Many knitters post their progress on social media or in forums. You can join a community, ask questions, and get support. Keeping a knitting journal or blog helps you remember what you learned and inspires others.
The Knitting Guide encourages you to celebrate every step. Each project brings new skills and confidence. You are now part of a creative, friendly community. 😊
Community and Resources
Books and Online Guides
You can find a world of knitting knowledge in books and online guides. Many knitters love classic books because they give step-by-step instructions and helpful pictures. You might enjoy magazines like Vogue Knitting or Pom Pom Quarterly. These magazines offer patterns, tips, and lots of inspiration. If you want to learn from videos, online platforms like Craftsy and Creativebug have classes for every skill level. You can watch lessons on basic stitches or even sweater knitting.
Here’s a quick look at some top resources:
Category | Examples and Descriptions |
|---|---|
Community & Pattern Database | Ravelry: A major community site with over 5 million members, serving as an organizational tool and yarn & pattern database. |
Knitting Magazines | Vogue Knitting, Pom Pom Quarterly, Interweave Magazines, Rowan Magazine, Knitty, amirisu: Respected publications offering patterns, tutorials, and inspiration. |
Online Tutorial Platforms | Craftsy, Creativebug: Platforms offering classes and workshops on knitting techniques and projects, including sweater knitting. |
Expert Blogs & Tutorials | Fringe Association (Karen Templer), The Craft Sessions (Felicia Semple): Blogs with in-depth tutorials and knitting technique analysis. |
You can also check out KnitPro. This blog stands out for its easy-to-follow tutorials, expert advice, and reviews of knitting tools. Many knitters trust KnitPro for creative ideas and community support.
Forums and Groups
You do not have to knit alone. Many friendly forums and groups welcome beginners. Ravelry is one of the biggest online knitting communities. You can join groups, ask questions, and share your projects. People from all over the world post photos, give advice, and cheer each other on.
Tip: If you feel stuck, post your question in a group. Someone will help you out!
Local yarn shops often host knitting circles. You can meet other knitters, learn new tricks, and make friends. Social media groups on Facebook and Instagram also connect knitters. You can join a group, follow hashtags, and see what others are making.
Expert Tips
You can learn a lot from experts who share their knowledge online. Here are a few you might want to follow:
Tian Connaughton shares tips on pattern planning and marketing, especially on Instagram.
Pam of The Crochetpreneur offers free resources and runs a Crochet Business Summit for craft business owners.
Nina of She Knows SEO gives advice on building websites and using SEO, which helps if you want to share your knitting online.
Remember: Every knitter started as a beginner. You can always find help, support, and inspiration in the knitting community. 😊
You started with a slip knot and learned each stitch, step by step. Now you know how to read patterns and finish a sweater. Mistakes happen, but they help you grow. Keep practicing and watch your skills improve. Want support or new ideas? Join a knitting group or online forum. Pick up your needles and start your first project. Enjoy every moment of your knitting journey! 🧶
FAQ
How do I fix a dropped stitch?
If you drop a stitch, don’t panic! Use a crochet hook or your needle to pull the loop back up through the stitches above. Work slowly. You can find many helpful videos online.
What should I do if my knitting looks uneven?
Uneven stitches are normal when you start. Keep practicing. Your tension will improve over time. Try to relax your hands and keep your yarn moving smoothly. Blocking your finished piece can also help even things out.
Can I switch yarns in the middle of a project?
Yes, you can! Just tie the new yarn to the old one with a small knot. Leave a tail to weave in later. Try to change yarn at the edge for a neater look.
How do I read a knitting chart?
A knitting chart shows your pattern with symbols. Each square stands for a stitch. Read the chart from right to left for right-side rows and left to right for wrong-side rows. Check the chart key for symbol meanings.


