When you ask, “what is the garter stitch in knitting,” you get a simple answer. Garter stitch means you knit every row. This creates a soft, bumpy fabric that looks the same on both sides. Many people love garter stitch because it does not curl at the edges and feels cozy in your hands. If you are a beginner, you will find that garter stitch lets you relax and focus on moving the yarn and needles.
Here’s why so many new knitters start with garter stitch:
The pattern repeats, so you can practice without stress.
Garter stitch helps you spot and fix mistakes.
Small garter projects, like squares or blankets, build your confidence.
Many people say garter stitch feels calming and comforting.
You can enjoy learning what is the garter stitch in knitting, knowing it is a classic choice for anyone starting their knitting journey.
Key Takeaways
Garter stitch is when you knit every row. It makes a soft, bumpy fabric. Both sides of the fabric look the same.
This stitch is simple to learn. It is great for beginners. You only use the knit stitch. The pattern repeats and is easy to follow.
Garter stitch fabric stays flat. It does not curl at the edges. This makes it good for scarves and blankets. It is also nice for other warm projects.
Mistakes are easy to see in garter stitch. The texture is clear and the ridges are even. This helps you fix errors quickly.
Learning garter stitch helps you feel confident. It lets beginners practice basic skills. You can try harder patterns after learning this one.
What is the garter stitch in knitting
Garter stitch basics
If you want to know what is the garter stitch in knitting, you just need to remember one thing: you knit every row. This means you do not switch between knit and purl stitches. You simply keep knitting on every row, and the pattern forms by itself. Many people call this the easiest knitting stitch pattern because you do not have to remember any complicated steps.
When you use garter stitch knitting, you create a fabric that looks the same on both sides. You do not have to worry about which side is the front or the back. This makes it perfect for beginners who want to focus on learning how to move the yarn and needles. You can relax and enjoy the process.
Tip: If you ever lose track of your rows, just look at the bumpy ridges. Each ridge means you have finished two rows of knitting.
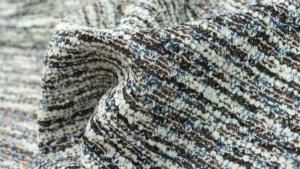
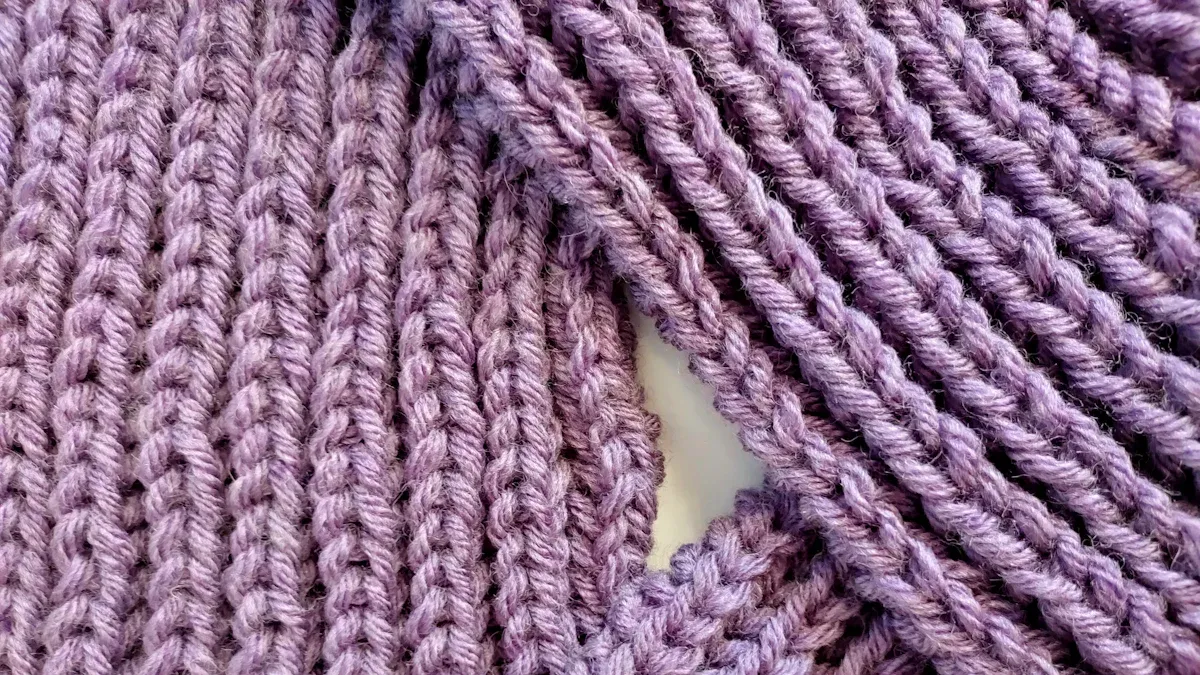
Texture and appearance
The texture of garter stitch fabric feels soft and bumpy. When you touch it, you notice the little ridges that run across the fabric. These bumps come from knitting every row. The fabric is stretchy and cozy, which makes it great for scarves, dishcloths, and blankets.
Here are some key features of garter stitch texture and appearance:
You get a soft, bumpy surface that is completely reversible.
The fabric does not curl at the edges, so your project stays flat.
Garter stitch is forgiving. If you make a mistake, you can spot it and fix it easily.
The stitch works well with chunky yarns, making the texture stand out.
The fabric feels thick and warm, perfect for cozy projects.
Garter stitch stands out because it does not curl like stockinette stitch. The reason for this is the balance in the structure. When you knit every row, you create equal numbers of front and back stitches. The curling forces cancel each other out, so your garter stitch fabric stays flat. You do not need to add any special borders to keep it from rolling up.
You might notice that both sides of the garter stitch look the same. Sometimes, it is hard to tell which side is the front. Some knitters put a marker on the first row to help them keep track. This reversibility is one of the things that makes garter stitch knitting so popular.
History and name
The name “garter stitch” has an interesting story. People have used this stitch for hundreds of years. In the 19th century, knitters made garters—bands to hold up stockings—using this stitch. They would cast on stitches, knit every row, and sometimes add loops or tassels for decoration. Garter stitch was perfect for these bands because the fabric stretched and stayed flat.
The term “garter stitch” first appeared in knitting books between 1905 and 1910. Even before that, people used this stitch to make the welts at the top of stockings as far back as the 1500s. In the 17th century, knitters used garter stitch on the edges of garments to stop them from rolling. Museums still have old pieces of clothing with garter stitch borders, showing how long this stitch has been important in knitting.
You can also find garter stitch in traditional fishing sweaters and Shetland shawls. Knitters liked it because it was reversible and did not curl. Today, you still see garter stitch used for borders, panels, and even the center of shawls. The simple garter stitch pattern has stood the test of time.
Why garter stitch is great for beginners
Easy to learn
When you start knitting, you want something simple and stress-free. Garter stitch is the easiest stitch you can learn. You only need to knit every stitch, row after row. There is no need to learn purling right away. This makes garter stitch perfect for beginner knitters who want to see quick progress. Many guides say that garter stitch stands out because you do not have to worry about switching stitches or keeping track of complicated patterns. You just pick up your needles and knit every stitch. Both sides of your fabric look the same, so you never get confused about which side is which.
Tip: If you ever feel bored with a garter stitch scarf, try a small project like a hat or dishcloth. These projects keep things interesting and help you build new skills while still using the basics.
Garter stitch creates a squishy, compact, and reversible fabric.
You do not need to learn purl stitches at first.
The pattern is easy to remember and repeat.
Forgiving for mistakes
Everyone makes mistakes when learning something new. Garter stitch helps you spot and fix those mistakes quickly. The texture has clear, bumpy ridges, so any error stands out. If you drop a stitch or knit the wrong way, you will see it right away. The fabric lies flat and stays stretchy, so you can easily pull out a few rows and try again.
How It Helps Beginners Identify and Correct Mistakes | |
|---|---|
Knit every stitch on both sides | Makes the fabric reversible and easy to read |
Uniform ridges and texture | Mistakes show up clearly against the pattern |
Simple, repetitive pattern | Easy to track progress and spot errors |
You will learn to read your knitting and understand how each stitch looks. This skill helps you fix mistakes and grow as a knitter.
Builds confidence
Mastering garter stitch gives you a strong foundation in knitting. When you finish your first project, you feel proud and ready to try more. Many beginner knitters start with a garter stitch scarf or square. These projects help you practice, learn to fix mistakes, and gain experience. As you get comfortable, you can move on to new stitches and patterns. Knitting instructors often suggest starting with garter, then slowly adding new skills like purling or colorwork. Each step builds on what you already know.
Remember: Every mistake is a chance to learn. The more you practice garter stitch, the more confident you become. Soon, you will be ready for any knitting challenge!
How to knit garter stitch
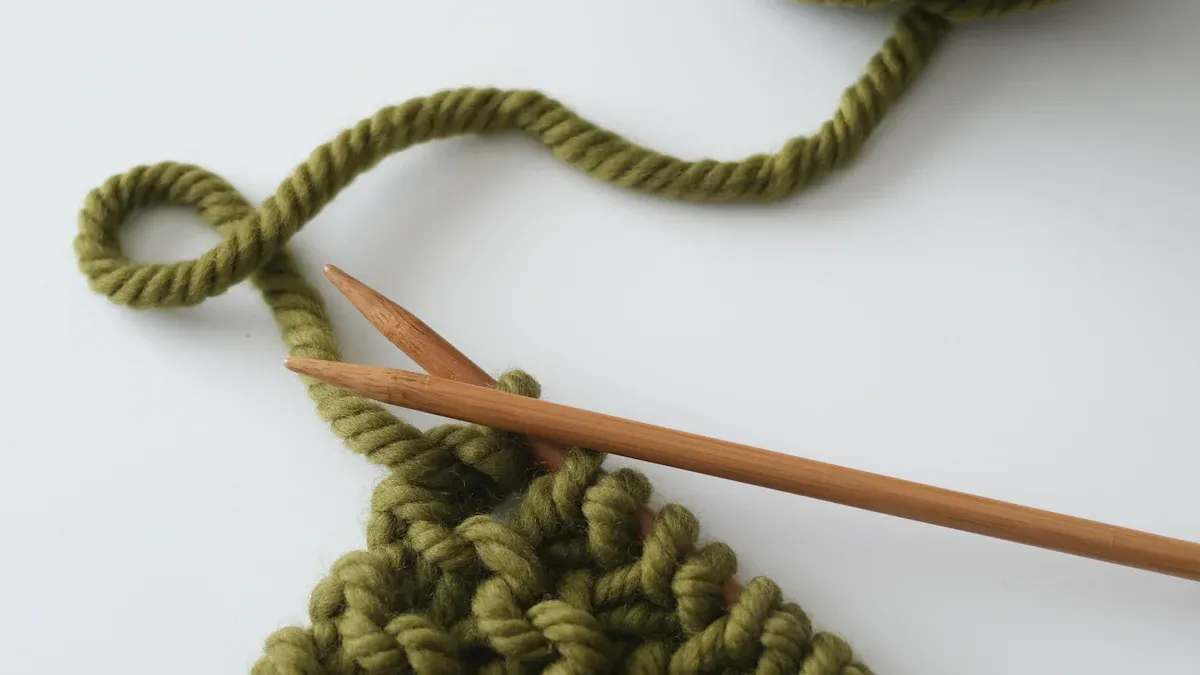
Garter stitch knitting flat
If you want to learn how to knit garter stitch, starting flat is the best way. You only need to use the knit stitch. This method helps you see your progress and fix mistakes easily. Here’s a simple step-by-step guide for knitting garter stitch flat:
Cast on the number of stitches you need for your project. For example, you might cast on 42 stitches for a large scarf.
Knit every row. Turn your work at the end of each row and keep knitting. This is the heart of garter stitch knitting.
Keep going until your piece reaches the length you want. You will see bumpy ridges forming as you go.
When you finish, bind off your stitches to secure the edge.
If your pattern asks for it, you can add ribbing or other details at the end.
You can use this technique for scarves, dishcloths, or even blankets. Many beginners ask how to count garter stitch rows. The easiest way is to count the ridges on one side of your work. Each ridge means you have knitted two rows. This trick helps you keep track without losing your place.
Tip: Use medium-weight yarn, like worsted weight, and light colors. These choices make your stitches easier to see and help you spot mistakes.
Garter stitch in the round
Knitting garter stitch in the round feels a bit different from flat knitting. If you knit every stitch in the round, you will get stockinette, not garter. To create the bumpy garter texture, you need to alternate between knit and purl rounds.
Here’s how to knit garter stitch in the round:
Knit the first round.
Purl the next round.
Repeat these two rounds for the whole project.
This method gives you the same ridged, spongy fabric as garter stitch knit flat. Remember, you must turn your work when knitting flat, but you do not turn it in the round. That is why you need to purl every other round. Many knitters find this technique a little tricky at first, but you will get used to it with practice.
Note: If you want to practice knitting garter stitch in the round, try a small project like a headband or a simple hat. These projects help you learn the difference between flat and round knitting.
Common mistakes
When you start learning how to knit garter stitch, you might make a few mistakes. That is normal! Here are some of the most common problems and how you can fix them:
Mixing up garter stitch and stockinette: Sometimes, you might forget to purl in the round or accidentally purl when knitting flat. This mistake changes the texture. Always check your pattern and remember which stitch comes next.
Dropping stitches: If you drop a stitch, you might see a hole or a change in the ridge pattern. To fix this, use a crochet hook. Insert the hook from front to back on knit rows and back to front on purl rows. This method helps you keep the correct garter bumps.
Fixing mistakes near the edge: It can be hard to fix errors at the edge of your work. Try using double-pointed needles to drop down to the mistake and knit back up.
Losing track of rows: Many beginners ask how to count garter stitch rows. Count the ridges on one side. Each ridge equals two rows.
Zoning out and making mistakes: If you lose focus, you might knit the wrong stitch. Use stitch markers to mark the edges or pattern changes. This helps you stay on track.
Tip: Choose yarn that is easy to see and handle. Medium-weight, light-colored yarns work best for beginners. They help you spot mistakes and make learning more fun.
Knitting garter stitch flat or in the round takes practice. If you make a mistake, do not worry. Every knitter has been there. Just keep going, and you will get better with each project.
Garter stitch vs. other stitches
Garter stitch vs. stockinette
When you start knitting, you will hear about stockinette stitch. This is another basic stitch pattern. You create stockinette by knitting one row and then purling the next. The fabric looks smooth on one side and bumpy on the other. Garter stitch, on the other hand, uses only the knit stitch on every row. Both stitches have their own look and feel, but they behave very differently.
Here’s a quick comparison to help you see the differences:
Feature | Garter Stitch | Stockinette Stitch |
|---|---|---|
Curling | Lays flat, does not curl | Tends to curl at edges |
Texture | Thick, stretchy, soft | Smooth, flat, slightly stiff |
Ease of Knitting | Easiest (knit every row only) | Slightly more complex (knit & purl) |
You will notice that garter stitch always lays flat. You do not have to worry about the edges curling up. Stockinette stitch curls at the sides and top, so you often need to add a border. Garter stitch feels thicker and softer, while stockinette feels smooth and a bit stiff. If you want a project that is easy and relaxing, garter stitch is the way to go. You only need to remember one motion—just keep knitting every row!
Tip: Many knitters use garter stitch borders with stockinette bodies to keep projects flat and neat.
Unique benefits
Garter stitch stands out for many reasons, especially if you are new to knitting. You only need to know how to knit, so you can focus on getting comfortable with your needles and yarn. The bumpy texture makes your projects feel cozy and warm. Garter stitch works well for scarves, dishcloths, and blankets because the edges stay flat and the fabric feels soft.
Here are some reasons why you might choose garter stitch for your next project:
You do not need to learn purling right away.
The fabric stays flat, so your scarf or blanket will not curl.
The texture adds warmth and interest to your knitting.
Garter stitch gives your project a firm structure, which is great for cardigans or hats.
You can use garter stitch for projects where you want both sides to look the same.
If you want a clean edge, try slipping the first stitch of each row. This trick makes your garter stitch projects look tidy, especially for scarves or shawls. Just remember, this edge will be less stretchy, so it works best for items where you want a neat finish.
Garter stitch helps you build confidence as you learn. You can see your progress, fix mistakes easily, and enjoy the process of knitting. That is why so many beginners start with garter stitch and keep coming back to it for simple, beautiful projects.
Beginner garter stitch projects
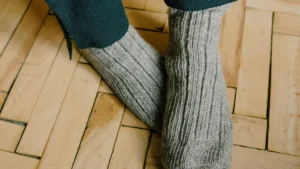
Scarves and dishcloths
Scarves and dishcloths are some of the best projects when you start with garter stitch. You only need to knit every row, so you can focus on making your stitches even and learning how to hold your yarn. Scarves let you practice casting on, knitting, and binding off. You can try different yarns and needle sizes to see what you like best. This helps you get comfortable with the basics of knitting.
Dishcloths are small, quick, and useful. You can finish one in a short time, which feels rewarding. When you knit a garter stitch dishcloth, you practice counting rows and reading your stitches. Many video tutorials show you how to start new rows, hold your yarn, and even add new skills like purling. These projects help you build good habits and confidence.
Tip: Try making a set of dishcloths in different colors. You will see your progress with each one!
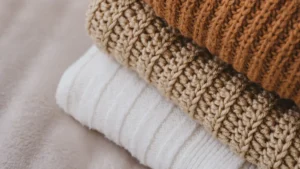
Blankets and accessories
A garter stitch blanket is a classic project that many knitters love. You knit every row, so you can relax and watch your blanket grow. Garter stitch blankets come in all sizes, from baby blankets to large throws. You can find many easy patterns, like the Simple Beginner Easy Blanket or the Kiss Blanket. These patterns use only basic stitches, so you can focus on enjoying the process.
Accessories like hats, cowls, and fingerless mitts also work well with garter stitch. You can try simple shaping by adding or removing stitches. Some patterns use fun variations, such as garter stitch ribbing or eyelet rows. These small changes keep things interesting and help you learn new skills.
Here are some popular garter stitch blanket patterns you might like:
Pattern Name | Type |
|---|---|
Simple Beginner Easy Blanket | Blanket |
Kiss Blanket | Blanket |
Very Easy Blanket | Blanket |
Lace & Garter Baby Blanket | Baby Blanket |
Garter stitch projects give you lots of practice with the basics. You learn how to keep your stitches even, count rows, and fix mistakes. Each project helps you feel more confident and ready to try new things in knitting.
You can begin knitting with garter stitch because it is easy and fun.
Garter stitch only needs the knit stitch, so you can learn without worry.
The bumpy feel looks nice and makes it easy to see mistakes.
Projects like scarves or dishcloths help you practice and make something you can use.
Remember, learning garter stitch helps you get ready for harder patterns. Try your first garter project now and have fun with each stitch!
FAQ
What yarn works best for garter stitch?
You can use almost any yarn for garter stitch. If you are just starting, try a medium-weight yarn in a light color. This makes it easier to see your stitches and spot mistakes.
How do I count rows in garter stitch?
Look at the bumpy ridges on your fabric. Each ridge means you have knitted two rows. Just count the ridges and multiply by two to find your total row count.
Can I use garter stitch for all my projects?
You can use garter stitch for many projects like scarves, blankets, and dishcloths. Some patterns need other stitches for texture or shaping. Garter stitch works great for simple, flat items.
Why does my garter stitch look uneven?
Your stitches might look uneven if your tension changes as you knit. Try to relax your hands and keep your yarn moving smoothly. With practice, your stitches will look more even.