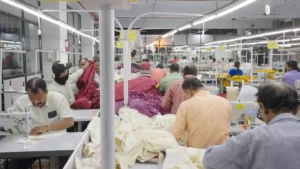
This guide shows you how to make a knit tech pack, step by step. Detail and accuracy matter for successful production. You do not need years of experience to create a strong knit tech pack. Clear instructions help you avoid mistakes and improve how you work with manufacturers. When you follow this process, you set yourself up for smooth production and fewer surprises.
Key Takeaways
A knit tech pack helps factories make your knitwear right. It gives them clear drawings, sizes, and material info. This helps them follow your design exactly.
Add flat drawings from every side. List all materials, color codes, notes on how to make it, and how to care for it. This stops mistakes and saves time.
Use Pantone color codes and colorway sheets. This keeps your garment colors the same as you want.
Measure your knitwear with care. Give graded specs so every size fits and looks the same.
Pick stitch types and ways to make it that fit your fabric’s stretch. This makes your clothes strong and comfy.
Set up your tech pack with clear parts, tables, and labels. This helps your team and factory work well and not get mixed up.
Change your tech pack after each sample check. This fixes problems early and keeps things moving.
Talking well and using good software helps your team work together. This helps you get the best results from your knit tech pack.
Knit Tech Pack Basics
What Is a Knit Tech Pack
A knit tech pack is a guide for making knitwear. It shows your design to the manufacturer in detail. This pack has flat sketches, measurements, and a BOM. It also lists construction details. You add yarn, fabric, trims, and label info too. Making a knit tech pack helps everyone see your idea for the clothing.
You must put these main things in your knit tech pack:
A full BOM with all yarns, fabrics, trims, and labels
Technical design sketches and colorways
Graded spec sheets and points of measurement
Construction details and special features
Labeling, folding, and packing instructions
Flat sketches, called fashion flats, show your clothing clearly. These drawings help the factory see the style and how it is made. Written notes explain things sketches cannot show, like special collars or fastenings.
Why It Matters
A knit tech pack is important for clear and correct work. It helps make sure your clothing matches your design. Manufacturers use your tech pack to avoid mistakes. If you give all the details, you lower the chance of errors and delays.
You also help the factory save time and money. With a full knit tech pack, you stop extra questions and sample changes. This means your clothing gets made faster and with fewer problems. Your tech pack sets the rules for quality and keeps things the same in every step.
Tip: Always check your knit tech pack before you send it to the manufacturer. Clear and full information gives you better results.
Common Challenges
Many designers have problems when making a knit tech pack. Missing or unclear info can cause confusion. For example, if you forget neckline details, the factory may not build the garment right. Unclear notes or wrong images can cause mistakes.
Common problems are:
No master BOM, so trims or packaging get missed
Points of measurement that do not fit the design
No placement instructions for embroidery or labels
Bad file organization, so the factory cannot find details
Using color codes the factory does not know, like HEX instead of Pantone
Missing fabric weight or GSM, which hurts production quality
If you avoid these mistakes, you help the factory make your clothing as you want. A good knit tech pack keeps your production smooth and easy.
Design Visualization
Showing your design clearly helps turn ideas into real knitwear. You must show every detail so the manufacturer knows what you want. This part tells you how to make strong flat sketches, use reference images, and point out key features for your knit tech pack.
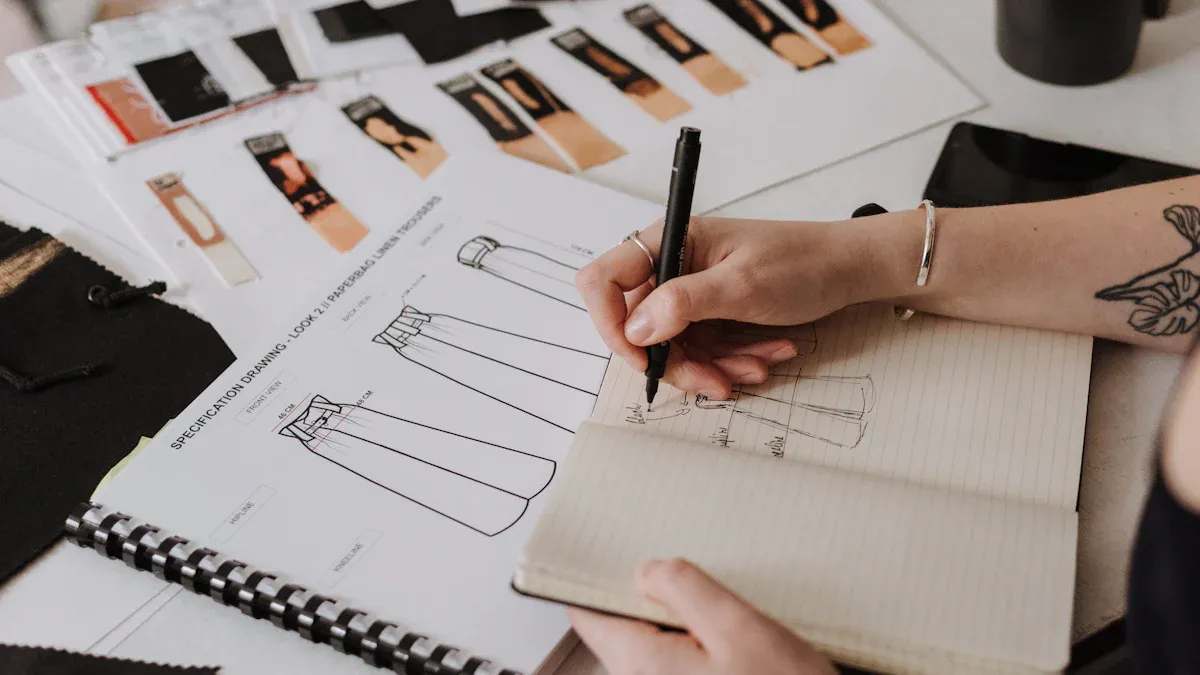
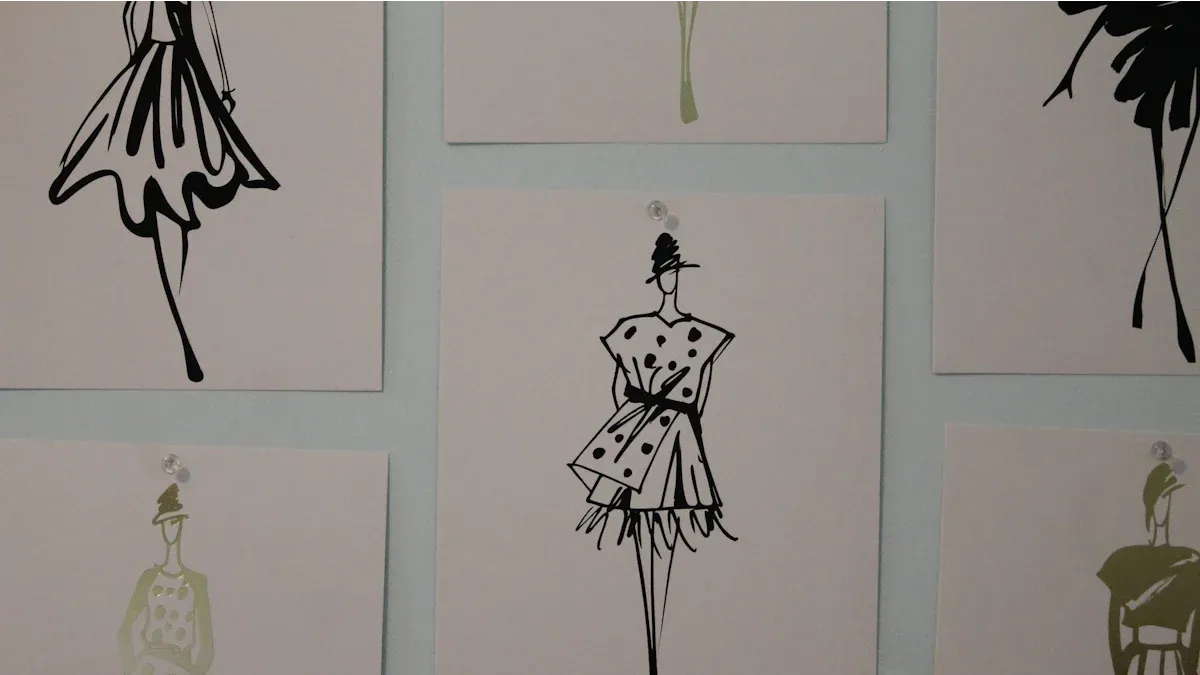
Flat Sketches
Flat sketches are the base of your tech pack. These are line drawings that show your garment flat. Flat sketches help show the shape, style, and important parts of your knitwear. You can draw them by hand or use digital tools like Adobe Illustrator or Photoshop.
Tip: Start with a flat template or croquis. This helps keep your sketches neat and correct.
When making flat sketches, follow these rules:
Draw both the front and back of your garment.
Use simple lines and shapes. Do not add shading or 3D effects.
Show all details like neckline, sleeves, hems, pockets, buttons, zippers, and stitch types.
Label each part with fabric names, trim types, colors, and materials.
Draw on grid or template paper to keep the size right. Use a 1:8 scale for adults and 1:4 for kids.
Write down measurements for length, width, and where each part goes. Use inches or centimeters.
Add a specification sheet with your sketch. This sheet lists size ranges, measurements, tolerances, stitch symbols, colorways, and notes for the manufacturer.
Always check your sketches for mistakes before adding them to your tech pack. Errors in sketches can cause problems when making your garment.
Reference Images
Reference images help show your inspiration and explain your design. You can use photos, magazine pictures, or digital images. These images help the manufacturer see the look and feel you want.
Pick images that match your design’s style, color, and texture.
Add notes to say what you like about each image. For example, you might like a sleeve shape or a knit pattern.
Put reference images next to your flat sketches. This helps the manufacturer compare and understand your ideas.
Note: Reference images do not replace technical design sketches. They help your sketches and make your ideas clearer.
Key Features
You need to point out key features in your design visualization. This helps stop mistakes during production. These features help the manufacturer know how to make your garment and find problems early.
Show the yarn direction and stitch type. This stops mistakes like wrong yarn direction or dropped loops.
Draw each garment part in the order it will be made. This matches how knitting is done and stops confusion.
Use layers in your sketches to show how parts overlap. This keeps your design clear and easy to see.
Label all special features like ribbing, cables, or seamless joins.
Make your sketches small but clear. Do not add too much detail so the manufacturer can see everything.
Link your notes and sketches. If you change a detail in your sketch, change your notes too.
A good design visualization connects your ideas to the finished product. When you follow these steps, you help the manufacturer make your knitwear just how you want.
Materials and BOM
A good knit tech pack always has a detailed Bill of Materials (BOM). The BOM is like a recipe for your clothing. You write down every material, from yarns to labels. This way, nothing gets left out when making your garment. If you organize your BOM well, the factory can work faster. This also helps stop expensive mistakes.
Yarn and Fabric
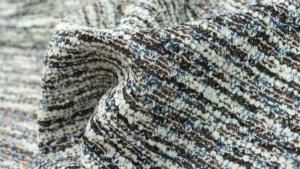
You must list all yarn types and fabric blends in your BOM. Each knitwear style uses different fibers for the right look and feel. For example, cardigans often use wool or acrylic to feel warm and soft. Sweaters can use wool, acrylic, or blends to be comfy and last longer. Rib knits and interlock fabrics may use cotton, bamboo, or synthetic fibers. These help the fabric stretch and breathe.
Here is a table that shows common yarn types and fibers used in knitwear:
Knitwear Type | Common Yarn Types and Fibers Used |
|---|---|
Cardigans | Wool, Acrylic |
Sweaters | Wool, Acrylic, blends |
Purl Knits | Cotton, Wool, Acrylic |
Rib Knit | Cotton, Wool, Hemp, Bamboo, Rayon, Modal, Tencel, Polyester |
Interlock Fabric | Cotton, Wool, Hemp, Bamboo, Polyester, Rayon, Modal, Tencel |
Mesh Knits | Nylon, Polyester |
Industrial Knits | Single filaments, Polymeric filaments |
You should also write down the fabric weight (GSM), yarn count, and any blends. Many knit fabrics, like French Terry or Milano Ribs, use both natural and synthetic fibers. These blends help the fabric stretch, soak up sweat, and last longer. Always include the supplier’s name and contact information for each yarn or fabric.
Trims and Labels
Trims and labels are small but important parts. You must list every trim, like buttons, zippers, drawcords, and elastic. For each trim, write the material, color, size, and supplier. Labels include care labels, brand tags, and size markers. You should show where each label goes and what it looks like.
Tip: Use clear photos or drawings for trims and labels. This helps the factory find the right parts and put them in the right place.
BOM Organization
A neat BOM keeps your production running smoothly. You group materials by type, like yarns, fabrics, trims, and labels. You use tables or spreadsheets to make the BOM easy to read. Each item should have its own code, description, amount, color, and supplier details.
Correct prices help you plan your spending.
Good measurements help save fabric and protect the planet.
Using the same words and formats helps you talk with your factory.
You can use BOM software to keep everything up to date and share it with your team. When your BOM is organized, everyone can work together and keep your project moving forward.
Color and Colorways
Picking and writing down colors is very important in your knit tech pack. You must show the exact colors you want and where they go. This helps your manufacturer make your garment look right and not make mistakes.
Pantone Codes
Pantone codes are a way to talk about color around the world. When you use Pantone codes, you set a clear goal for each color. This makes sure your red, blue, or green looks the same every time. Pantone codes work because they match colors to the fabric. You get a color that can be made again and again, even in different places.
Tell suppliers and manufacturers the exact color you need.
Keep your brand colors the same on all your products.
Stop confusion from color names like “sky blue” or “forest green.”
Use special guides, like Pantone TPX, to see how colors look on fabric.
Help everyone use the right color and work faster.
Tip: Always put the Pantone code for each color in your tech pack. This helps stop mistakes and keeps your colors correct.
Colorway Sheets
A colorway sheet shows all the color choices for your design. You use these sheets to show each version of your garment, like navy with white stripes or pink with gray cuffs. Colorway sheets help your manufacturer see all the choices quickly.
To make a good colorway sheet:
Put Pantone swatches into your design software, like Adobe Illustrator.
Make flat sketches for each colorway, showing front, back, and side.
Label each part of the garment with its Pantone code.
Keep your sketches simple so they are easy to read.
Add a table or list that matches each color to the garment part.
Garment Part | Color Name | Pantone Code |
|---|---|---|
Body | Navy | 19-4024 TPX |
Sleeves | White | 11-0601 TPX |
Cuffs | Gray | 17-5102 TPX |
Note: Make a different tech pack for each colorway if you have many. This helps you keep track and not mix things up.
Placement Details
You must show exactly where each color goes on your garment. Clear placement details stop mistakes and save time. Use front, back, and side views of your garment. Add close-up pictures for special spots like collars or cuffs.
Best ways to show color placement are:
Use clear notes to label seams, stitches, and trims.
Keep your sketches neat so they are easy to read.
Add diagrams or computer drawings to show how colors look when finished.
Include mood boards or color groups to help the manufacturer pick colors.
Show where each fabric, trim, or label goes, especially if the design is tricky.
When you write down color and colorways well, you help your manufacturer make your garment look just right. This step keeps your knitwear looking like your brand every time.
Measurements and Specs
Spec Sheet
A spec sheet is your main tool for sharing garment measurements with your manufacturer. You use it to show every important size and detail for your knitwear. This sheet acts as a map for how your garment should look and fit. You list all the measurements, tolerances, and notes in one place. This helps the factory make your design the right way.
You should include these details in your spec sheet:
Garment name and style number
Size range (for example, XS to XL)
All measurement points with clear labels
Tolerances for each measurement (how much the size can change)
Notes about stretch, fit, or special features
A clear spec sheet helps you avoid mistakes and keeps your production on track. Always double-check your numbers before you send the spec to your manufacturer.
Points of Measurement
You need to measure your knitwear at the right spots to get a good fit. These points of measurement help you and your factory check if the garment matches your design. Each point tells you where to measure and how to do it.
Here are standard points of measurement for knitwear:
Half Chest: Measure flat, straight across the front 1 inch below the armhole.
Waist Height from High Point Shoulder (HPS): Measure straight down from HPS.
Half Waist: Measure flat, straight across at waist height from HPS.
Half Bottom: Measure flat, straight across the bottom edge.
Front Length from HPS: Measure straight down from HPS to the bottom.
Across Shoulder: Measure flat, straight across from armhole to armhole.
Armhole Straight: Measure as a straight line between the highest and lowest points of the armhole.
Half Sleeve Opening: Measure flat, straight across the sleeve edge.
Sleeve Length from Center Back: Measure from center back neck, across shoulder, and along the sleeve to the cuff.
Front Armhole Height from HPS: Measure straight down from HPS to the lowest point of the armhole.
Half Upper Arm: Measure flat, straight across the sleeve 1 cm down from the armhole.
Neck Width Seam to Seam: Measure flat across the neck opening, including any trim.
Neck Width Inside: Measure flat across the neck opening, not including trim.
Front Neck Depth Seam to Seam: Measure straight down from the center of the neck seam to the front neck seam.
Tip: Use a table in your spec sheet to list each measurement, the method, and the allowed tolerance. This makes it easy for everyone to follow.
Grading
Grading helps you create different sizes from your base pattern. You use grading to make sure every size fits well and looks right. You do not just make everything bigger or smaller. Instead, you adjust each key point to match how bodies change from size to size.
Here is how grading works for knitwear:
Start with a perfect base size. Fix any errors before you grade.
Use grading rules to change each measurement point. For example, you might add 1 inch to the chest for each size up.
Adjust widths and shaping based on body measurements, not just fixed ratios. Knitwear stretches and behaves differently in each size.
Check that the fit stays the same in every size. Larger sizes may need extra changes for necklines or sleeves because the fabric stretches more.
Use digital grading tools if you can. These tools help you grade faster and with fewer mistakes.
Grading is not the same as pattern alteration. Pattern alteration fixes fit for one person. Grading creates a full size range for your whole line. Good grading keeps your fit and style the same in every size. This helps you build trust with your customers and makes production easier.
Stretch and Gauge
Stretch and gauge play a big role in making sure your knitwear fits the way you want. When you create your spec, you need to include both of these details. Gauge tells you how many stitches and rows fit into a certain space. This number controls the width and length of your fabric. If you get the gauge wrong, your garment may turn out too big or too small.
You should always measure gauge by making a swatch. Use the same yarn and needles that you plan to use for your final piece. Knit a swatch that is at least 6 to 8 inches square. This size helps you avoid mistakes from the edges. Add garter stitch edges to keep your swatch flat and stable. After you finish knitting, block the swatch. Blocking means you wash and shape it, then let it dry. This step shows you how the fabric will act after washing.
Tip: If your swatch does not match the pattern’s gauge, change your needle size. A bigger needle makes fewer stitches per inch. A smaller needle makes more stitches per inch. Adjust until your swatch matches the gauge in your spec.
Here is a quick checklist for measuring gauge:
Knit a large enough swatch to get a true reading.
Add garter stitch edges to keep the swatch from curling.
Block the swatch before you measure.
Change needle size if your gauge does not match the spec.
Stretch is just as important as gauge. Knit fabrics stretch more than woven fabrics. You need to check that your fabric stretches to the right amount and snaps back without losing shape. If your fabric is too stiff, the garment will feel tight and hard to wear. If it is too stretchy, it may become loose and baggy. Patterns often include a stretch gauge. This helps you test if your fabric stretches the right amount before you start sewing.
When you add stretch and gauge details to your spec, you help the manufacturer make your garment fit as planned. You avoid surprises and make sure your knitwear feels comfortable and looks great.
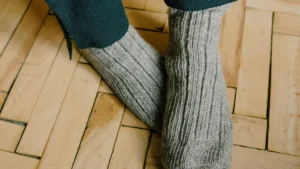
Stitch and Construction
Stitch Types
Choosing the right stitch type is key for strong and comfortable knitwear. Knit fabrics stretch, so you need stitches that move with the fabric. Overlock stitches (503, 504), coverstitch (406, 602, 605), and zigzag stitches (304, 404) work well because they stretch and keep seams from breaking. If you use a regular lockstitch, the seam can snap when the fabric stretches. This makes the garment less durable.
Chainstitches (Class 400) give you speed and stretch, but they can unravel if not secured. Coverstitches (Class 600) use extra threads to make flat, strong seams. These are great for activewear and everyday knits. Safety stitches combine chainstitch and overedge stitches. They protect the seam edge and add strength, which is important for high-stress areas. When you pick your stitch, think about how much the fabric will stretch and how much stress the seam will take. The right stitch keeps your garment lasting longer and looking good.
Tip: Always match your stitch type to your fabric’s stretch and the garment’s use. This helps prevent broken seams and keeps your knitwear comfortable.
Construction Details
You must include clear construction details in your knit tech pack. These details tell the manufacturer how to put your garment together. You should specify seam types, stitch density, thread type, and assembly methods. These choices affect how your garment fits, feels, and lasts.
Use stretchable stitches like chainstitch or overedge for knits. This stops threads from breaking when the fabric stretches.
Write down seam allowance and stitches per inch (SPI). This helps keep seams strong and neat.
List thread type and color for each part. This keeps the look and quality consistent.
Show where to place and attach hardware like zippers, buttons, or snaps. Good placement makes the garment work better and look more professional.
Add notes about shaping materials, such as interfacing or lining, if needed. These materials help the garment keep its shape.
Clear instructions help the factory avoid mistakes. When you give all the details, you get a garment that matches your design and lasts longer.
Diagrams
Diagrams make your construction details easy to understand. Schematics show the shape, size, and measurements of each garment piece. You should draw them to scale and add arrows to show knitting direction. This helps the manufacturer see how to assemble the parts and follow your design.
Good diagrams use labels, arrows, and sometimes color to show where each stitch or seam goes. You can use vector graphics software like Inkscape to make clean, professional schematics. Diagrams are especially helpful for tricky designs or when you use special stitches. They help everyone see the steps and avoid confusion.
Note: Add technical sketches and reference photos to your tech pack. Visual aids help the manufacturer follow your instructions and reduce errors.
When you use clear diagrams and detailed construction notes, you help your manufacturer build your knitwear just as you imagined. This step supports quality, fit, and a smooth production process.
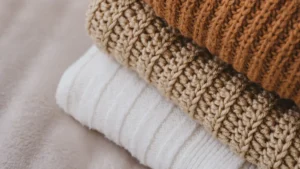
Care and Handling
Taking care of knitwear helps it last longer. It also keeps your clothes looking nice. Each fiber type needs its own care. You must wash, dry, and handle knits the right way. This keeps them in good shape.
Washing Instructions
Different fibers need different washing methods. If you wash them wrong, they can shrink or stretch. Some may even get ruined. Here is a simple guide for each fiber:
Fiber Type | Washing Instructions | Drying Instructions | Additional Notes |
|---|---|---|---|
Wool | Wash by hand in cold water or use a gentle cycle. Use mild detergent. Do not use hot water or scrub hard. | Lay flat to dry. This stops shrinking and keeps the shape. | Use wool detergent. Do not use bleach or fabric softener. |
Cotton | You can use a washing machine. Use gentle cycles for delicate cotton. Do not use high heat. | Dry on low heat or lay flat. Too much heat can shrink cotton. | Cotton blends are stronger. Pure cotton needs more care. |
Synthetics | Wash with warm water but keep it cool. Use mild detergent. | Air dry is best. You can use low heat in the dryer. | High heat can damage and make fuzz balls. |
Tip: Turn your knitwear inside out before washing. This keeps the outside safe and colors bright.
Follow these steps for best results: 1. Wash wool and delicate knits by hand in lukewarm water. Use gentle detergent. 2. Do not soak for long. Five to ten minutes is enough. 3. Rinse in cool water until the water is clear. 4. Squeeze out water gently. Do not twist or wring. 5. Wash natural fibers by themselves. Keep them away from rough fabrics.
Drying and Storage
Drying and storing knits the right way keeps them nice. Hanging wet knits makes them stretch and lose shape. Always dry your knits flat on a towel. Roll the towel with the knit inside to press out water. Then lay it flat again to finish drying.
Fold knits to store them. Do not hang heavy knits. They can stretch out.
Store knits in cool, dry, and dark places. Sun and water can hurt the fibers.
Use boxes that let air in or cedar chests to keep bugs away.
Air out your stored knits sometimes. This stops bad smells.
Note: Clean your knits before you put them away. Dirt and oil can bring bugs that eat your clothes.
Special Handling
Some knits need extra care. Knits with beads or sequins should be dry cleaned. This keeps decorations safe. For other delicate knits, use gentle detergent. Do not use fabric softener. Put them in a lingerie bag and turn them inside out before washing.
Keep fancy knits apart so they do not tangle.
Do not put too many things in the washer at once.
Always dry delicate knits flat. For light knits, you can use padded hangers. Do not put them in the sun.
Shape damp knits gently before drying. This helps them keep their shape.
Callout: Fold delicate knits with acid-free paper. Store them in dry, airy places. Do not stack heavy things on top. This stops them from getting crushed.
If you follow these tips, your knits will stay soft and strong for a long time.
Labeling and Packaging
Label Placement
You should think carefully about where to put labels. Labels show your brand and give important details. They can also make clothes more or less comfortable. In knitwear, you want labels that do not bother the skin. Many brands use satin labels because they feel soft. These are good for necklines and underwear. Cotton labels are better for eco-friendly brands. They feel natural and let skin breathe. But cotton labels may not last as long as polyester ones. Polyester or taffeta labels last longer and do not get ruined in the wash. But they can feel stiff on the skin.
When you add labels, think about comfort and how easy they are to see. Put brand labels inside the back neckline seam. Use a center or Manhattan fold to keep it neat. Place care and content labels in the lower side seam on the left. Do not use thick or scratchy labels on the back of the neck. Use heat transfer labels for clothes worn close to the skin. These tagless labels help stop itching. Sew labels into seams to keep them from falling off. Use soft or folded labels in places that touch the skin. Keep label spots the same on all your products. This helps people know your brand. Always put the right info on labels, like fabric type and where it was made.
Label rules are different in each country. In the US, labels must show what the garment is made of and where it was made. These details must be easy to find when selling. In Canada, labels must be in both English and French. Always check the rules for every country you sell in.
Branding
Branding on labels and packaging helps people remember your products. You can use your logo, colors, and special fonts to stand out. When you use the same branding everywhere, people trust your brand more. It also makes your knitwear easy to spot in stores.
Try these ideas for strong branding. Put your logo on every label and package. Pick colors and fonts that match your brand style. Add a slogan or message that fits your brand story. Make sure your branding looks the same on all items, from tags to boxes.
Tip: Good branding on labels and packaging makes your knitwear look professional and helps customers remember you.
Packaging
Packaging keeps your knitwear safe and shows off your brand. You want packaging that protects clothes from damage, water, and wrinkles. At the same time, it should look nice in stores.
Here is a table that shows how packaging choices affect protection and presentation:
Packaging Aspect | Protection Benefits | Presentation Benefits |
|---|---|---|
Materials | Rigid artboards, foam inserts, and moisture-resistant bags keep garments safe from damage and moisture. | Kraft paper and recycled boards offer sturdy, printable surfaces for branding. |
Bag Types | PP bags block moisture; non-woven bags keep garments wrinkle-free. | Canvas and cotton bags add style and improve customer experience. |
Box Design | Inserts and closures stop garments from moving and getting damaged. | Custom printing, embossing, and lamination boost brand value. |
Printing & Finishing | Laminations add durability. | Spot UV, foiling, and embossing make packaging look special. |
Structural Features | Collapsible boxes make shipping easy and reduce damage. | High-quality boxes attract customers and encourage purchases. |
Extra Elements | Foam inserts cushion delicate knits. | Branded tissue paper and garment bags create a great unboxing experience. |
Pick packaging that fits your brand and keeps your products safe. Good packaging protects your knitwear and makes a great first impression.
Embellishments and Finishes
Adding embellishments and finishes makes your knitwear look special. These details can also give your clothes more uses. There are many ways to make your garments unique. This section shows you how to write down each detail for your tech pack. That way, your manufacturer knows what you want.
Printing
Printing lets you put colors, patterns, or photos on your knitwear. You can pick from different printing methods. Screen printing is good for bold shapes and solid colors. Digital printing works for detailed pictures and lots of colors. Dye sublimation is best for polyester knits and gives bright, long-lasting prints.
When you plan printing, always include:
The print type (screen, digital, dye sublimation)
Where the print goes (front, back, sleeves)
The size and how big the design is
The Pantone codes for every color
Tip: Use a flat sketch and mark where the print goes. This helps the factory put the design in the right spot.
Printing on knits needs extra care. The fabric can stretch, so the print must stretch too. New printing and dyeing methods can make very clear images and bright colors. Always test your print on a small piece of fabric first.
Embroidery
Embroidery adds texture and makes your knitwear stand out. You can use flat or 3D embroidery for different looks. Embroidery is great for logos, patterns, or special touches. You need to plan embroidery because knit fabrics can stretch and move.
Follow these steps for good results:
Pick a firm spot for embroidery. Tighter or less stretchy areas work best.
Put a stabilizer under the fabric. This keeps the knit from stretching or wrinkling.
Test your design on a small piece first. This lets you see how the stitches look.
Stretch the fabric in the hoop if you will embroider on parts that stretch, like beanies or chest panels.
Choose the right thread and how close the stitches are. Too many stitches can make the fabric stiff or hurt it.
Note: Always show exactly where the embroidery goes on your tech pack sketch. Mark the size and thread colors for each spot.
Embroidery machines and skilled workers help you get neat, strong designs. Tie off all threads well so the design stays nice after washing and wearing.
Special Finishes
Special finishes make your knitwear look and work better. You can pick from many finishes to fit your design.
Common finishes are:
Softening: Makes the fabric feel smooth and soft.
Mercerisation: Adds shine and makes colors brighter and stronger.
Napping or Brushing: Makes the surface soft and fuzzy.
Water Repellency: Keeps the garment dry in the rain.
Antimicrobial: Stops bad smells and keeps the fabric fresh.
Shrinkage Control: Helps the garment keep its shape after washing.
Finish Type | Benefit |
|---|---|
Softening | Softer hand feel |
Mercerisation | More shine and color strength |
Napping/Brushing | Warmer, softer surface |
Water Repellent | Stays dry in rain |
Antimicrobial | Reduces odor |
Shrinkage Control | Keeps shape after washing |
Modern finishes use safe chemicals or machines. Some finishes, like bio-polishing, use enzymes for a smooth feel. Others use nanotechnology for extra protection. Always list each finish in your tech pack. Write down the method and where it goes. This helps your manufacturer make your knitwear just how you want and makes sure it works well.
Final Checklist
Review for Completeness
Check your knit tech pack before sending it to the factory. Make sure every part is correct and has enough detail. A full tech pack helps stop mistakes and keeps things moving. Use this checklist to help you review:
Flat sketches show all sides and details.
The BOM lists every yarn, fabric, trim, and label with supplier info.
Colorways use Pantone codes and clear notes for where colors go.
Spec sheets have all measurements, tolerances, and grading rules.
Construction details explain stitch types, seam sizes, and how to put it together.
Diagrams and technical drawings show hard-to-understand parts.
Labeling and packaging instructions are clear and follow the rules.
Care instructions match the fiber and garment type.
Embellishments and finishes have details about where and how to add them.
Tip: Check that each part matches your design and sample notes. Keeping things the same helps the factory know what you want.
Common Errors
Some designers forget small but important details in their knit tech packs. These mistakes can slow down production and cost more money. Watch out for these common problems:
Construction details that are missing or not clear
Technical sketches without close-up notes
Labeling and packing info that is wrong or missing, including label placement and following the rules
Not enough detail in the BOM and fabric charts
Not saying the tolerances in graded spec sheets and Points of Measurement
Forgetting knit fabric needs, like putting price tags in the right spot so you do not make holes
These problems can make it hard to talk with the factory. You might get errors, have to fix things, or wait longer for your order.
Sample Review
Making samples is important to see if your knit tech pack works. At each step, measure every sample and update your tech pack if you make changes. Your tech pack should change as you work on samples. Update garment sizes, patterns, and the BOM when you check and fix samples. Write down these changes so the factory can make your garment right and keep the quality good. Adding pictures or rules for where to measure helps keep things the same.
Follow these steps to check samples and keep your tech pack current:
Check the first sample with your tech pack and write down any changes.
Fix the tech pack and send the new version to the factory.
Do a fit check using a form that matches your size chart.
Write down changes for patterns and sewing, then tell the pattern makers.
Send the updated tech pack to the factory for another sample if needed.
When you like the sample size, ask for a size set and make graded measurements.
Ask for a pre-production sample to check the final design before making a lot.
Ask for a top of production sample from the line to check how it is made.
Keep writing down and sharing every change to make sure everything is right before making all the garments.
Note: Treat your tech pack like a living document. Every time you update it during sample checks, you help stop problems and make sure your final product is just how you want.
Clothing Tech Pack Essentials
Key Components
A strong clothing tech pack gives you all the info you need. It helps turn your design into a finished product. You should include every detail so your manufacturer can follow your plan. All clothing tech packs have some main parts. Knitwear tech packs need extra details about fabric and how to make the garment.
Here are the main things every clothing tech pack needs:
Product Summary: Write the article name, code, product type, color, gender, season, supplier, and retail price.
Technical Flats: Add technical drawings that show your apparel from every angle. Include front, back, side, and inside views.
Measurements and Grading Specs: List all measurements for each size. Add tolerances so the factory knows how much each size can change.
Color Definition: Show all available colors and colorways. Use clear codes so there is no confusion.
Bill of Materials (BoM): List every fabric, trim, and hardware item. For knitwear, highlight special fabrics like rib knit or jersey knit.
Construction Details: Explain how to put the garment together. Include seam types, stitch types, and where to place pockets or closures.
Care Information: Give washing and care instructions for the end customer.
Cost Sheet: Break down the cost for fabric, trims, labor, and shipping.
Comments and Feedback: Leave space for notes and changes during sample reviews.
You can see how these parts work together in this table:
Component | Description |
|---|---|
Product Summary | Basic info about the apparel, including codes and pricing |
Technical Flats | Drawings from all angles to guide production |
Measurements/Grading | Size charts and tolerances for each size |
Color Definition | List of all colors and colorways |
Bill of Materials (BoM) | All fabrics, trims, and hardware, with special notes for knitwear |
Construction Details | Assembly instructions, stitch types, and placement of features |
Care Information | Washing and care guidelines |
Cost Sheet | Detailed cost breakdown |
Comments & Feedback | Space for sample review notes and manufacturer communication |
Knitwear tech packs often show fabric types and stitch details. You might see notes like “rib knit on cuff” or “jersey knit body.” These notes help the factory use the right materials.
Organization Tips
You want your clothing tech pack to be easy to read. Good organization helps everyone work faster and make fewer mistakes. Here are some tips to keep your tech pack clear:
Use clear section headings for each part of your tech pack.
Keep your layout simple. Use tables for measurements, BOM, and costs.
Number your pages and add a table of contents if your apparel tech pack is long.
Use the same words and codes for colors, fabrics, and trims throughout the document.
Add callouts or notes on your technical flats to point out special features.
Store your tech packs in digital folders with clear names and dates. This helps you find the latest version quickly.
Share your clothing tech pack with your team and manufacturer in a format they can open, like PDF or Excel.
Tip: Check your apparel tech pack before you send it out. A neat tech pack saves time, stops mistakes, and helps you get the clothes you want.
Apparel Tech Pack Best Practices
Communication
Good communication helps you get what you want. You must give clear instructions to your manufacturer. Use easy words and short sentences. Always check if your notes match your sketches and measurements. If you do not understand something, ask questions early. This helps stop mistakes before they happen. Keep all your messages in one place. Use email, cloud folders, or project tools. This makes it easy to find answers and stops confusion. When you change your clothing tech pack, tell your team and the factory. Share new versions right away so everyone has the latest info.
Tip: Use checklists and feedback forms to track changes and questions. This helps you and your manufacturer work together.
Software Tools
The right software makes your apparel tech pack better and easier to use. You can use Adobe Illustrator to draw fashion sketches and make vector designs. This tool lets you use special symbols, pattern tools, and Pantone colors. These features help you make clear and correct sketches for your tech pack. Spreadsheets like Excel or Numbers help you with measurement specs and size charts. You can use formulas to do grading and size math. This saves time and helps stop mistakes. Do not export sketches as JPGs. Paste vector sketches from Illustrator into your tech pack. This keeps your images sharp and easy to change. Cloud tools like Google Drive or Dropbox help you share your apparel tech pack. These tools let your team and factory work together at the same time. You can control versions and avoid confusion from emails. For advanced needs, you can use CAD and 3D software like Gerber AccuMark, Optitex, Lectra, Tukatech, or CLO 3D. These programs help you make patterns, grade sizes, and see how garments look. They are very helpful in fashion design.
Paste vector sketches from Illustrator for better images.
Share tech packs on Google Drive or Dropbox for teamwork.
Try CAD or 3D tools for pattern making and previews.
Industry Standards
You should always keep up with industry standards for apparel tech packs. Standards change when new tools and ways of working come out. Learn about new trends in clothing tech pack creation. Join online groups, read trade magazines, and go to webinars. These steps help you learn best ways to work and avoid old mistakes. Many brands use the same layout for their apparel tech pack. This makes it easier for factories to follow your instructions. Use clear tables, labeled sketches, and detailed notes. Always use Pantone codes for colors and standard words for fabrics and trims. This keeps your apparel production smooth and professional.
Note: Following industry standards helps your fashion tech packs stand out. It also builds trust with your manufacturer and makes your apparel line stronger.
If you focus on details and talk clearly, your production goes well. Use the checklist and follow best practices to stop mistakes and keep things running smoothly. You can download tech pack templates or get help from experts if you need it. Learning these skills gives you more control and helps you become a better designer.
Remember: A good tech pack helps you get better results every time.
FAQ
What is the most important part of a knit tech pack?
You must focus on clear flat sketches and accurate measurements. These help your manufacturer understand your design. If you skip details, you risk mistakes in production.
How do you choose the right yarn for your design?
You should match the yarn to your garment’s purpose. Soft yarns work well for comfort. Strong yarns last longer. Always test a swatch before you decide.
Can you use photos instead of flat sketches?
Photos help show inspiration, but you still need flat sketches. Sketches give clear views and details that photos cannot. Use both for the best results.
How often should you update your tech pack?
You should update your tech pack after every sample review or design change. Keeping it current helps your team and factory avoid confusion.
What software works best for making tech packs?
Adobe Illustrator works well for sketches. Excel or Google Sheets help with measurements and BOMs. You can also use cloud tools to share files with your team.
Why do you need Pantone codes for colors?
Pantone codes give you a universal color language. You avoid confusion and get the same color every time. Factories use these codes to match your vision.
What should you do if your sample does not match your tech pack?
Check your tech pack for missing or unclear details. Update the document with corrections. Share the new version with your manufacturer before the next sample.
Do you need a tech pack for every colorway?
Yes, you should make a tech pack for each colorway. This keeps your instructions clear and helps the factory avoid mixing up colors.